Wednesday, July 15, 2015

Maximo 7.6.0.1 Fix Pack installation guide with snapshoots.

On June 19, 2015, IBM Software released the 7.6.0.1 fix pack for Maximo Asset Management (here) .  

the new Fix Pack work for Products

· IBM Maximo Asset Manager Scheduler 7.5.3.0
· IBM Maximo Mobile 7.5.1.0
· IBM Industry Solutions > Asset Configuration Manager 7.5.1.1
· IBM Industry Solutions > Nuclear 7.5.1.0
· IBM Industry Solutions > Oil and Gas 7.5.1.0
· IBM Industry Solutions > Service Provider 7.6
· IBM Industry Solutions > Transportation 7.5.1.0
· IBM Industry Solutions > Utilities 7.5.0.1
· IBM Industry Solutions > Spatial 7.5.0.1
· IBM Industry Solutions > Health, Safety and Environment Manager 7.5.1.0 

the size of this Fix Pack 330 mig and that sound is good where IBM used to release fixes with size nearly to 1.5 GB, and this fix has new installation  wizards and methodology and the aim of this post to illustrate this installation steps with snapshots.


Before you begin

1- Ensure that no database configuration changes are pending.
SELECT count(*) FROM maxobjectcfg WHERE changed!='N';

2- Shutdown all Maximo applications and back up the database.
3- Copy the Maximo directory and save it to another location.

This fix pack is provided as an Installation Manager (IM) compressed file. When the fix pack is installed by using the Installation Manager program, the existing Maximo directory structure is overwritten. The fix pack also contains database scripts that modify the existing database.
If you want to reverse the changes, you must restore the earlier version of the Maximo directory and database that you saved to another location.


 Procedure

1- Download the 7.6.0.1-TIV-MAMMT-FP0001 compressed file and copy it to the Administrative Workstation machine.

2- Run the Installation Manager from the following directory:
  • Windows: Start > All Programs > IBM Installation Manager > IBM Installation Manager
  • UNIX: In the /opt/IBM/InstallationManager/eclipse directory, run the IBMIM command. 
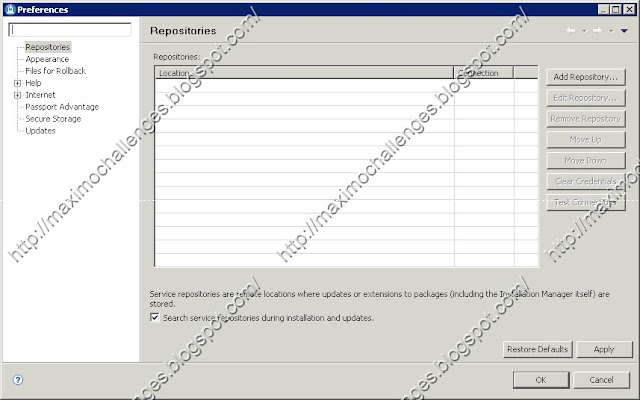
  •  


4- Click the Add Repository button, find the downloaded coprossed file ,then select it .
 

5- in the preferences dialog box, click OK.
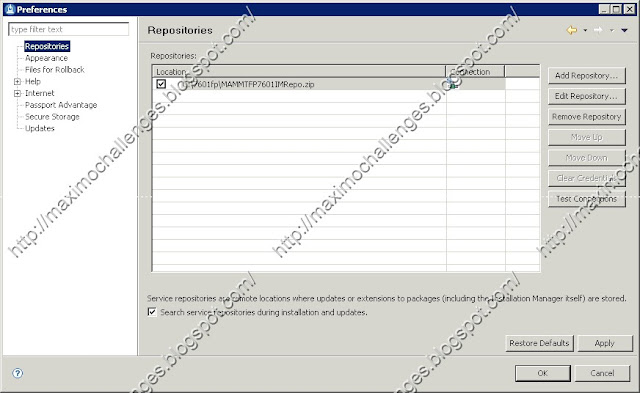
 

  1. 6 - Click the Update icon


    7 - In the Update Packages dialog box, select the IBM Tivoli's process automation suite package group, and click the Next button.


    8-  Click next .


    9- Select Accept the terms , then click next .


    10- Keep defaults, click Next.


    11 - Select IBM Maximo Asset Managment 7.6.0.1 , then click update.


    12- waite untill the update completed


    13- Click Finish


    You can automatically configure the fix pack by using the UI configuration tool, which removes the need for manual tasks.

    Procedure

    1. Start the configuration program
      • For Windows 7 and above, navigate to C:\IBM\SMP\ConfigTool\ConfigUI.exe or <InstallLocation>\ConfigTool\ConfigUI.exe.
      • For UNIX, navigate to the <installLocation>/ConfigTool directory and run ConfigUI. For example, /opt/IBM/SMP/ConfigTool/ConfigUI.


    2. In the Deployment Operations pane, select the Update Database, Build and Deploy Application EAR Files option.


    3- To complete the configuration, Click Next .


    4- Click finsh.

     5 - validating deployd system

     6- Running Validattion and configuration.


     7 - After Complete .click OK.


    Importing report design files into IBM Maximo Asset Management Multitenancy

    This fix pack contains new and updated report design files. If you previously customized delivered BIRT reports, the customizations might be overwritten with this fix pack. You can also review any reports that you created to ensure that they display correctly. After you install the fix pack, use the report import utility to import any necessary design file updates to your existing reports. For more details, access the Maximo 76 Report Development Guide.

    Procedure

    1- On the administrative workstation, browse to <install_home>\maximo\reports\birt\tools.
     
     
    2- Open the reporttools.properties file. This file indicates the location to where the reports are imported.
    3- Edit the reporttools.properties file to meet your system requirements.
    4- Run the importreports.cmd to import your report design files.


    No comments:

    Post a Comment